Showing posts with label Students Tell All. Show all posts

Saturday, April 28, 2018

Get Yourself in a Pickle


I used to think that pickles were just another condiment to put on your burger.  However, I have since learned that pickles actually have MANY health benefits in addition to being very flavorful!  Pickling has been used for centuries all around the world to preserve food.  The basic recipe is cucumber, salt, vinegar, and seasoning.  I used to buy pickles at the store, but then I realized it's actually super easy and cheap just to make your own pickles at home.  Making them at home also allows you to customize the vegetables and seasonings to what you like.  Use old vegetables in your fridge that are about to go bad to preserve them - and at the same time, you are not wasting food and money.  Get pickling!


4 Health Benefits of Pickles

1. Healthy Vegetable
Pickles are made from cucumber and cucumbers are actually a very healthy vegetable!  Cucumbesr contain mostly water, are extremely low in calories, and have no fat.  Pickles are also not cooked, and cooking any food breaks down some of the nutrients that are heat-sensitive.  So the pickling process preserves the cucumber's antioxidants!

2. Source of Probiotic
Pickles are made through a fermentation process.  This fermentation process involves just throwing all the ingredients into a mason jar and then letting the pickles ferment.  During fermentation, sugars in the cucumber are broken down to make good bacteria.  These good bacteria are known as probiotics.  Probiotics increase the good bacteria in your gut, improve your digestion, and are overall beneficial for your health.

3. Relieves Muscle Cramps
After you eat your pickles - save the juice!  This may sound gross, however, studies show that when you drink pickle juice, it takes as little as 85 seconds to relieve any muscle cramps.  The reason is not  yet understood, but the process has been proven to work.  Keep some leftover juice in the fridge for the next time you have an extra-tough workout.

4. Prevents Sugar Crashes
Pickles that include vinegar in the recipe make your stomach release glucose slowly.  This means you won't have a sugar crash later after eating a carb-heavy meal.  So, when you eat a burger, make sure to add pickles!  This way, instead of feeling tired and sluggish soon after eating your meal - you'll have steady energy instead!


This pickle recipe is so easy and not a big "dill."  It's simple with minimal and cheap ingredients.  Also, feel free to switch out ingredients or seasonings to customize this recipe to what you like!  For example, add some red pepper chili flakes to your pickles to give them a spicy kick!

Dill Pickles

Total Time: 20 minutes
Yield: 1 quart

Ingredients
  • 1 1/2 cups distilled white vinegar
  • 1/4 cup sugar
  • 4 tsp salt
  • 1 tsp mustard seeds
  • 1 tsp coriander seeds
  • 2 cups hot water
  • 2 lb kirby cucumbers, sliced 1/4-inch thick
  • 3/4 cups coarsely chopped dill
  • 3 cloves garlic, coarsely chopped
Directions
  1. In a large, heatproof measuring cup, combine vinegar, sugar, salt, mustard seeds, dill seeds, and any other seasonings you may want to add with hot water and stir until the sugar and salt are dissolved.  Let the brine col.
  2. In a large bowl, toss cucumbers with dill and garlic.  Pour brine over cucumbers and turn to coat.  Place a small plate over cucumbers to keep them submerged, then cover bowl with plastic wrap.  Refrigerate the pickles overnight, stirring once or twice.  Serve cold.
  3. Pickles can be refrigerated in an airtight container for up to 1 week.

Friday, April 27, 2018

I Love Food from My Head Tomatoes


Fruit or vegetable?

Is a tomato a fruit or a vegetable?  Or both?  A tomato has seeds and grows on a vine like a grape.  But tomatoes are not sweet in the same way fruit is.  As it turns out, many not-sweet produce are categorized as a fruit when people commonly refer to them as a vegetable.  Pumpkins and squash are other examples of these fruits (1).

Vegetables are parts of a plan such as the leaves, stems, or roots.  Lettuce and carrots are examples of vegetables by this definition.  So a tomato is a fruit because it has seeds, grows above ground on a vine, and is the flowering part of the plant.

How can I use tomatoes in meals?

There are more than 15,000 different kinds of tomatoes (2).  Some common varieties you will find at the store are cherry, Roma, Opalka, Valencia, and Caspian Pink.  Tomatoes are great for sauces, salads, and toppings.

Sauces

The San Marzano, Amish Paste, Roma, Viva Italia, and the Opalka varieties of tomato are best for sauces because their flavor is muted, but intensifies when cooked (3).  That makes these varieties great for a delicious, flavorful sauce.  Tomato sauce is great for making spaghetti, chicken parmesan, and pizza.

Salads

Cherry, grape, Kumato, Campari, and Beefsteak tomatoes are great for salads because they are sweet, usually small, and provide a great flavor profile with muted vegetables like lettuce and cucumber (4).  A simple garden salad or Caprese salad are both a light, but flavorful summer salad options.

Toppings

Big beef, steak sandwich, heirloom, beefsteak, and Black Krim tomatoes are great as toppings for sandwiches and burgers because they are large and give a full slice to cover a sandwich as well as being flavorful and juicy (5).

Tomatoes also make a meal more appetizing because they can make it more colorful.  Tomatoes come not only in many varieties, but also in many colors.  Tomatoes can be red, yellow, purple, or green.  All of them have slightly different tastes and can be used in different recipes that benefit from those different flavors (6).


How do I pick a good tomato at the grocery store?

When choosing a good tomato at the grocery store, pay attention to color, smell, and weight.  The color should be dark and even throughout.  If a red tomato has patches, that means it was picked from the vine while it was still green and means the flavor may not be as good.  The smell of a tomato should be earthy.  The stronger the tomato smells, the richer the flavor will be.  When picking up a tomato, try not to squeeze it, just hold it in your palm.  It should be heavy for its size; this means that it is juicy and ripe (7).

Why should I use tomatoes in meals?

Tomatoes have many health benefits included with its delicious flavor and texture.  Fruits and vegetables contain antioxidants that can help prevent cancer.  Tomatoes are no different.  The antioxidant they contain is called lycopene and has been linked to help prevent many diseases, including heart disease and cancer.  Tomatoes also have vitamins and minerals that help our body to function properly and help us feel healthy.  Some of these vitamins and minerals are vitamin C, folate, potassium, and vitamin K (6).

Try this tomato soup recipe at home!

It is so fast and easy and is super yummy!  Even though tomatoes are not sweet like other fruit, they are still sweet in their own way.  I made this recipe for dinner one time and I wanted to make the bisque more creamy, so I added more Greek yogurt, but it made it a little too sour.  The soup turns out creamy anyway and the tomatoes and seasonings give a really rich flavor.  I also made some grilled cheese sandwiches to go along with it because it is one of my family's favorite meals.  Enjoy!

Tomato Bisque
Adapted from https://fitfoodiefinds.com/20-minute-healthy-tomato-bisque-soup/

Prep Time: 10 minutes
Total Time: 20 minutes
Servings: 8

Ingredients

  • 3 Tbsp cooking oil
  • 1 small yellow onion, diced
  • 1/4 tsp garlic powder
  • 1/2 tsp salt
  • 1/8 tsp black pepper
  • 1/4 cup tomato paste
  • 2 cans (28 oz each) diced tomatoes
  • 1 Tbsp dried Italian seasoning
  • 2 cups chicken broth
  • 1/2 cup Greek yogurt
Directions
  1. Place oil in a large pot over medium high heat.
  2. Add onion to pot with garlic powder.  Sauté about 5 minutes or until onions are translucent.
  3. Place content of the pot into a high-speed blender.  Add salt, pepper, tomato paste, diced tomatoes, Italian seasoning, and chicken broth.  Process on high for 2-3 minutes, or until desired consistency.
  4. Transfer the contents of blender back into pot and simmer about 10 minutes.
  5. Remove from heat and add Greek yogurt.  Stir.  Serve with additional Greek yogurt, green onion, and homemade bacon bits.


References:

  1. https://www.livescience.com/33991-difference-fruits-vegetables.html
  2. https://www.heirloomtomatoplants.com/Heirloom%20-Tomato_Plants_Heirloom_Tomato%20_seeds.htm
  3. http://homeguides.sfgate.com/top-10-tomato-plants-sauces-56577.html
  4. https://www.seriouseats.com/2015/06/heirloom-tomato-types-varieties-shopping-guide.html
  5. http://www.texaschickenandburgers.com/blog/best-types-tomatoes-burgers
  6. https://www.healthline.com/nutrition/foods/tomatoes
  7. https://www.thekitchn.com/a-guide-to-picking-the-best-tomato-at-the-grocery-store-234276

Popeye Was on to Something!


Remember growing up and watching the famous Popeye sailor?  If Popeye found himself in a sticky situation, he would pop his spinach open and pour it straight into his mouth.  Instantly his forearms grew and he was indestructible!  Surprisingly, Popeye wasn't the first to discover spinach.  The earliest documentation of spinach was in the early eighth century AD and thought to have originated in ancient Persia, known as Iran in the modern world.  This tiny green leaf has been around the world for a while now and doesn't plan to go anywhere soon!


Spinach is no joke!  This green superhero is jam packed with vitamins and minerals, including vitamin K, C, A, B6, and folate, possibly giving you more energy, immune support, and helping your night vision!  Some minerals included in this ancient leaf are calcium, potassium, and iron.  It can possibly help lower blood pressure with the potassium counteracting daily salt consumption.  However, the calcium and iron within spinach is not very useful for your body, due to other parts of the spinach making your body unable to digest those certain nutrients.  Aside from calcium and iron, your body can use all of the other great nutrients within this tiny green leaf.  With little to no calories and an adaptable flavor it can be added to a variety of recipes without changing the flavor or texture.

Some ideas of where you can add your spinach:

  • smoothies
  • cupcakes (What?  YES, really!)
  • sandwiches
  • soups
  • hummus
  • other dips (spinach artichoke, anyone?)
  • pesto
  • additional topping to your favorite pizza

How to choose spinach
  • Find small leaves that are free of wilts, yellow spots, or brown edges.
  • Watch out for any leaves that are wilted or have holds.
  • Try to look for stems that are on the thinner side, thick stems may indicate the spinach was overgrown.
  • The spinach should have a fresh, sweet smell with a springy, crisp texture.
This recipe is a fun and easy way to incorporate Popeye's secret power!

A layer of ranch spread is topped with a rainbow bed of veggies and chicken to create a healthy adn beautiful way to enjoy your lunch or snack!

Rainbow Veggie Pinwheels

Ingredients
  • 4 large tortillas
  • 2/3 cup whipped cream cheese, can use light
  • 1 Tbsp dry ranch powder
  • 1/2 cup thinly sliced red bell pepper
  • 1/2 cup thinly sliced carrrot
  • 1/2 cup yellow bell pepper
  • 1/2 cup baby spinach leaves
  • 1/2 cup shredded purple cabbage
  • 1 cup cooked shredded chicken, optional
Instructions
  1. Mix together cream cheese and ranch powder until thoroughly combined.
  2. Spread cream cheese mixture evenly over tortillas.
  3. Leaving 1 inch border on all sides, lay out 2 Tbsp of each vegetable in rows across tortillas (in rainbow order); top with shredded chicken, if using.
  4. Roll up each tortilla tightly; if ends don't stay shut you can use cream cheese to "glue" it back down.


Thursday, April 26, 2018

Oatstanding Breakfast!

Oatstanding Breakfasts


Everyone’s busy and mornings can be a rush. Regardless, breakfast is still the most important meal of the day. Many individuals choose to go without breakfast because of time and availability. Having the ability to grab a well balanced meal on the way to work or school will help save time and help keep you and your family fed. Overnight oats includes many healthy components including: rolled oats, milk, yogurt, fruit, nuts and seeds. It is the perfect combination of carbohydrates, proteins, and fats. Carbohydrates come from the oats and fruit, proteins is from the yogurt, milk and nuts, and fat comes from the nuts, yogurt and milk.
Oats are an excellent source of soluble fiber. Soluble fiber is a certain type of fiber that helps lower bad cholesterol levels. Fiber helps aid digestion and reduces constipation. One cup of oats contains 7.5 grams of fiber. It is recommended that women consume 25 grams of fiber and men consume 38 grams of fiber.

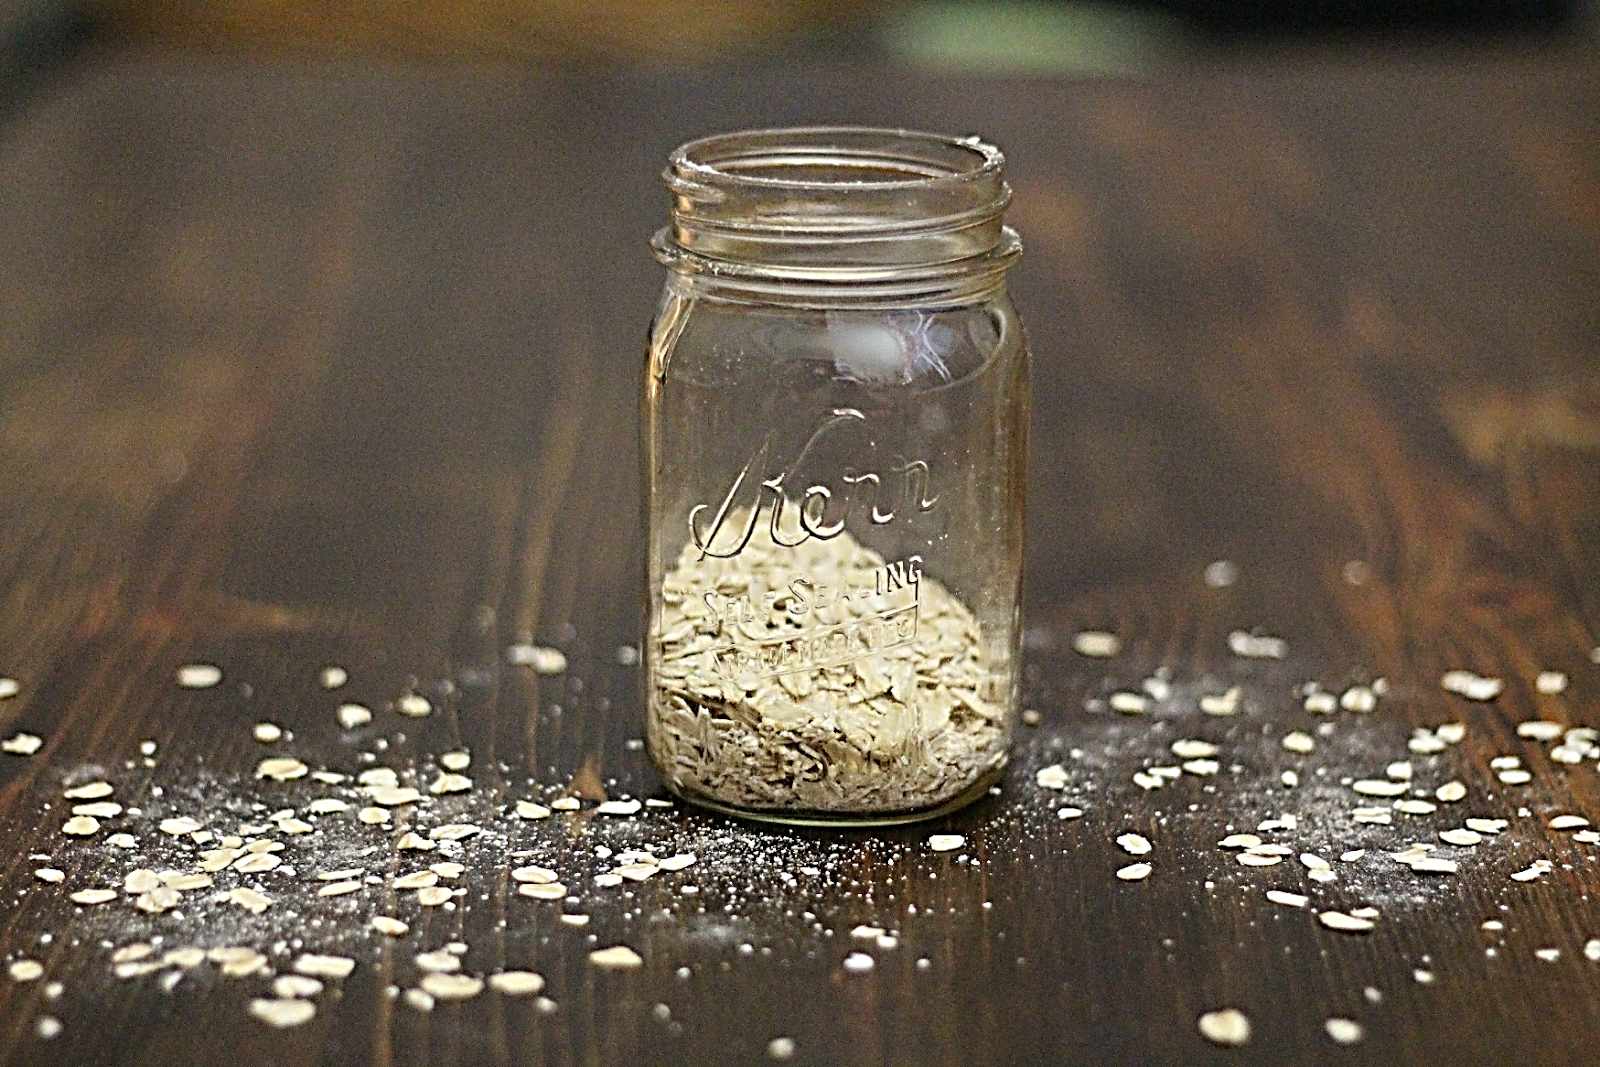
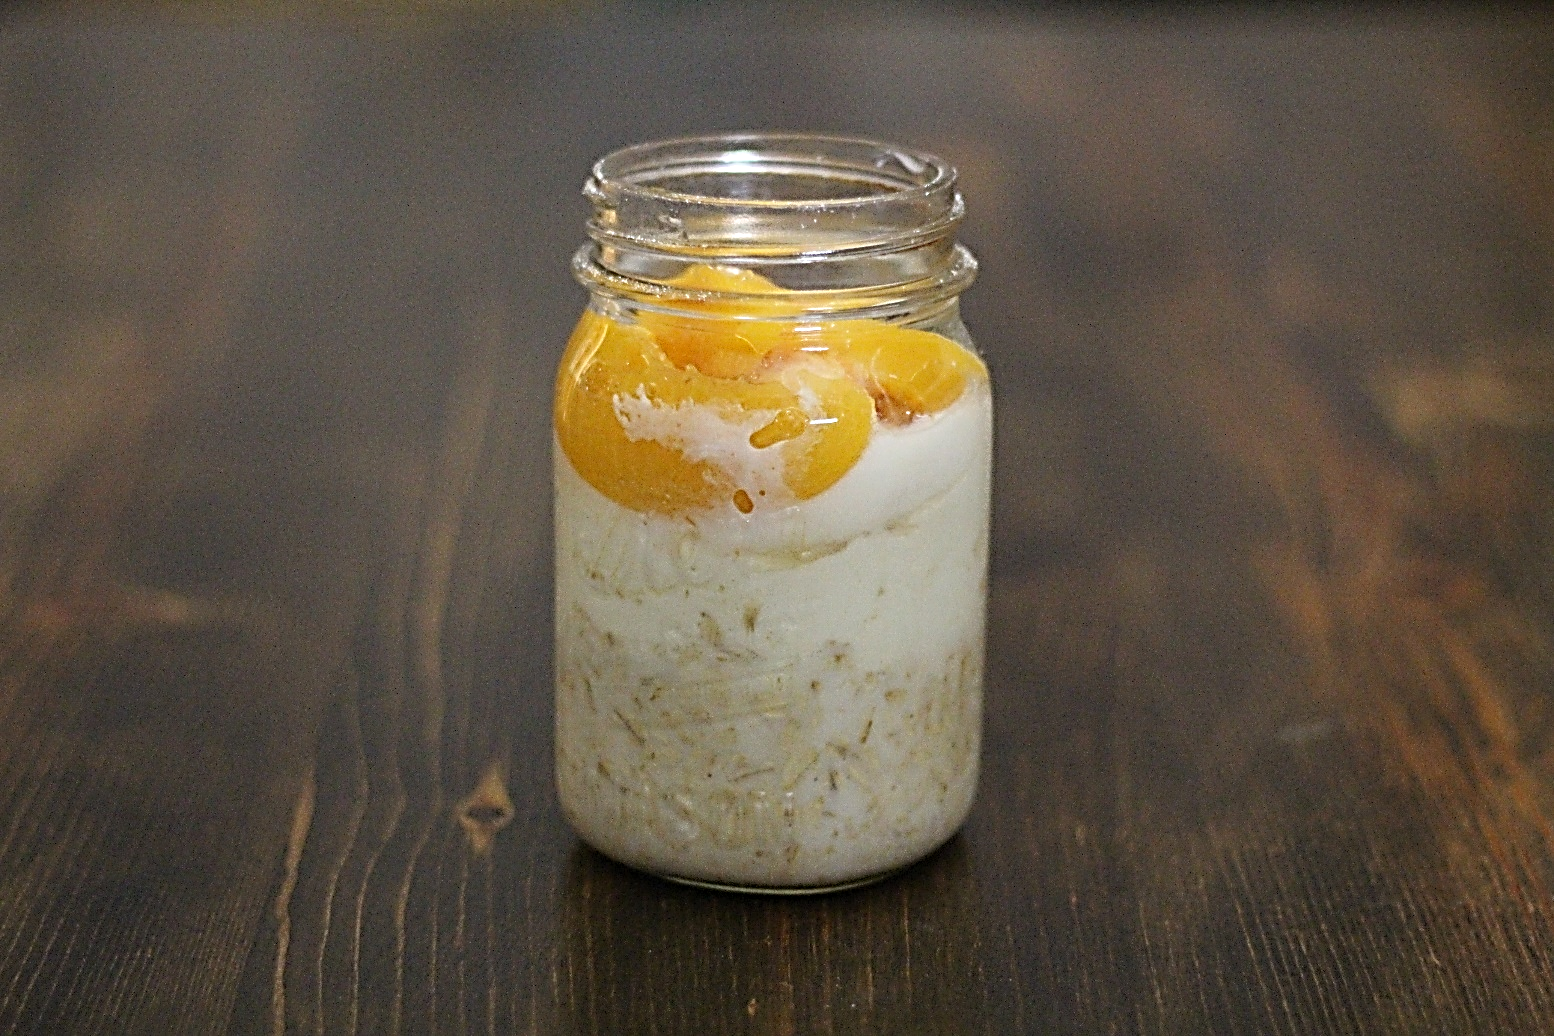
Layer the ingredients in a pint size Mason jar or any kind of seal-able container.


To prepare the overnight oats you will need:
½ cup of rolled oats
½ cup of milk
½ of plain yogurt (can be greek or regular)
½ cup fruit (be creative and choose whatever you like)
¼ cup of nuts, seeds or anything else you’d like to top it off with

Begin by adding a layer of rolled oats


Then add the listed amount of milk, be sure the milk covers the oats. You may have to add more depending on the amount of oats added.


Add a half cup of plain yogurt. This can be regular or greek. The fruit will add sweetness to the dish. The yogurt is the source of protein in this dish and more may be added if desired.
Now add whatever type of fruit is available, in season, or is your favorite. I chose peaches that I canned from the year before. The fruit you add can be frozen or fresh.

Top off with nuts such as almonds, walnuts, or cashews. You can also add flax or chia seeds if wanted.


Put a lid on the jar and store in the refrigerator. Allow oats to soak in the refrigerator for at least 5 hours or overnight for best results.
You can double the recipe and put it in a quart size jar for larger quantity. They will last up to 4 days depending on the fruit added and how long they will stay fresh. For example, bananas will last up to 2 days.


References: https://www.medicalnewstoday.com/articles/270680.php

Wednesday, April 25, 2018

Crispy Baked Chickpeas

Perfect Pulses—Crispy Baked Chickpeas
Chickpeas are like the chameleon of the pulse world. From a salad topping, to hummus, to brownies(!), the possibilities are endless. Pulses—the edible seeds of legumes, including peas, lentils, beans, and chickpeas—are a good source of protein and fiber. They are also high in zinc, magnesium, iron, and potassium, folate, and potassium. These tiny powerhouses are packed with good-for-you nutrients.
C:\Users\hanna jo\Documents\Spring 2018\Education and Counseling\FE45F2A4-7FEA-4ABD-B02F-4D9C737FD294.JPG
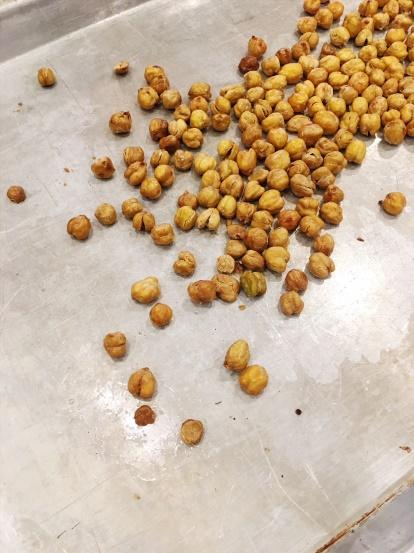
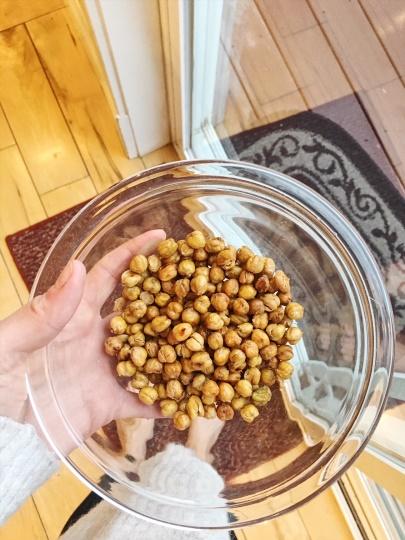
Salty, crunchy, and even addicting, these perfectly poppable pulses are a versatile addition to salads and soups, but tasty enough to stand alone as an afternoon pick-me-up with a good dose of protein to keep you full.

C:\Users\hanna jo\Documents\Spring 2018\Education and Counseling\921E2740-A00B-4668-A39E-59C374A6F8E6.JPG

Speaking of protein, plant foods may have more protein than you realize. One half cup of chickpeas contains over twice the amount of protein as an egg. Even carrots contain 2 grams of protein per serving. Additionally, studies have shown that plant-based diets are incredibly heart healthy.  

C:\Users\hanna jo\Documents\Spring 2018\Education and Counseling\F4C52EAD-5108-4EED-B12E-42F56633E97F.JPG

A couple of things to keep in mind with this recipe:
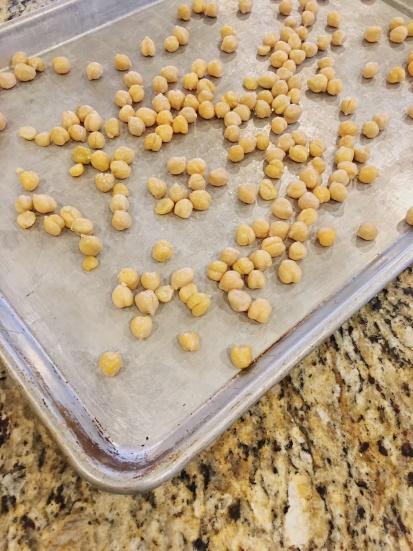
  • You’ll definitely want to rinse and thoroughly DRY your chickpeas prior to baking. Spread the chickpeas in a single layer on a sheet pan and stick them in the refrigerator to dry them out even more.
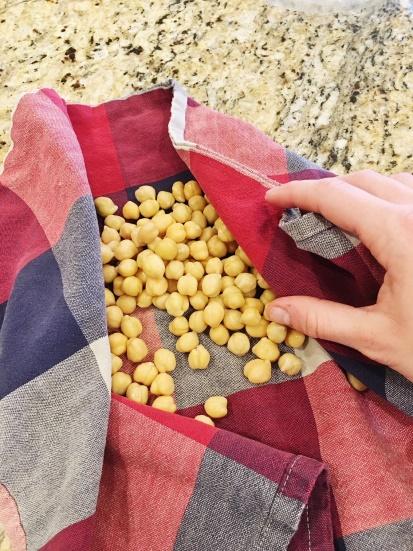
  • Peeling the skins ups the crisp factor. I know this sounds tedious—so, either turn on your favorite Netflix show (xoxo Gossip Girl) and peel them individually, or use this tip: vigorously rub the chickpeas with a dry cloth or paper towel, and the skins should naturally start peeling off. Unless, of course, you need an excuse to watch your favorite Netflix show; then the former method is acceptable.

C:\Users\hanna jo\Documents\Spring 2018\Education and Counseling\902760A8-F376-4071-B734-F07BDC00193B.JPGC:\Users\hanna jo\Documents\Spring 2018\Education and Counseling\BC365AF4-ED55-46CF-9840-94CA53DE65A0.JPG

As far as storage, it’s best to store the chickpeas uncovered; otherwise, they’ll lose their crunch. They should stay fresh for up to 4-5 days uncovered…if they last that long.

C:\Users\hanna jo\Documents\Spring 2018\Education and Counseling\6E3C925D-25A2-4DED-B151-077AAE0F2C81.JPG


Crispy Baked Chickpeas
Crunchy, versatile, flavorful, and healthy, these snackable chickpeas are a simple and easy way to incorporate pulses into your life.
Ingredients

  • 1 15-ounce can chickpeas, very well drained + thoroughly dried
  • 1 Tbsp avocado or other neutral oil (if avoiding oil, omit and don't rinse chickpeas out of the can - just drain)
  • 1/2 tsp salt
  • 1 tsp seasoning of choice (curry powder, paprika, etc.)
Instructions:
  1. Preheat oven to 350 degrees F and set out a bare baking sheet.
  2. Drain chickpeas well. If using oil, rinse well with water and thoroughly drain. If omitting oil, simply drain well and skip rinsing with water.
  3. Once drained well, spread the chickpeas out on a clean, absorbent towel and use your hands to gently roll and dry the chickpeas. Some of the skins should start coming off. You can opt to peel all of the chickpeas - which can help for extra crispiness! - or simply remove the skins that come off. Either way, the chickpeas will crisp up.
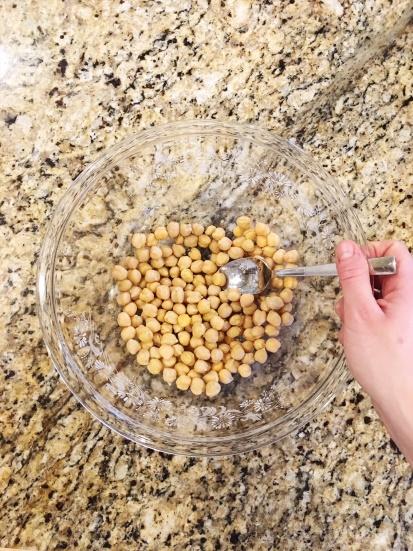
  4. Transfer the chickpeas to a mixing bowl and top with oil (or omit) and salt. Mix well to combine. DO NOT add the other seasoning at this point - it can interrupt the crisping process, so wait until after baking.
  5. Bake for a total of 45-50 minutes or until golden brown and dry/crispy to the touch. I like turning my pan around and shaking the chickpeas at the halfway point for even cooking.
  6. Remove from oven and toss with seasonings (if desired) while still warm. Then let cool 5-10 minutes - they will continue crisping as they cool.
  7. Serve as is or atop bowls or salads! To store, place in a Tupperware container or jar and DO NOT tightly cover. Instead, crack lid so they can "breathe" a bit. These are best on the first day, but they will last for 4-5 days at room temperature. Alternatively, seal well and freeze up to 1 month.
*Recipe adapted from Minimalist Baker


    Berry Delicious and Nutritious!

    Berry Delicious and Nutritious!
    Important question for everyone: what happens when 357 blueberries try to go through the door at the same time?
    ……
    ……..
    …...
    A blueberry jam!
    Image result for blueberry
    Bad puns aside, berries are a bunch of super amazing fruits. They are extremely versatile and can be used in different salads, savory dishes, baked goods, desserts, and drinks.
    When you’re talking nutrition, berries can’t be beat for their rich supply of fiber, antioxidants, and minerals! They’ve also been researched extensively for the apparent ability to fight and prevent several types of cancer. Additional health benefits include:

    • Prevention of heart disease
    • Prevention of liver damage
    • Control of type 2 diabetes
    • Improved memory, balance, and coordination


    When are berries in season in Utah?
    A quick jaunt over to www.seasonalfoodguide.org informs you of the months they’ll be at the peak of freshness and deliciousness. If you search for a local farm, you might even get to pick them yourself!

    • Strawberries: June-October
    • Blackberries: August-September
    • Blueberries: June-August
    • Raspberries: June-September
    • Boysenberries: June-July


    The recipe below is great for a bright, sunshine-y summer day or a gathering of family and friends. If you want to make things more exciting, add your favorite fruit or change things out for what’s currently in season!


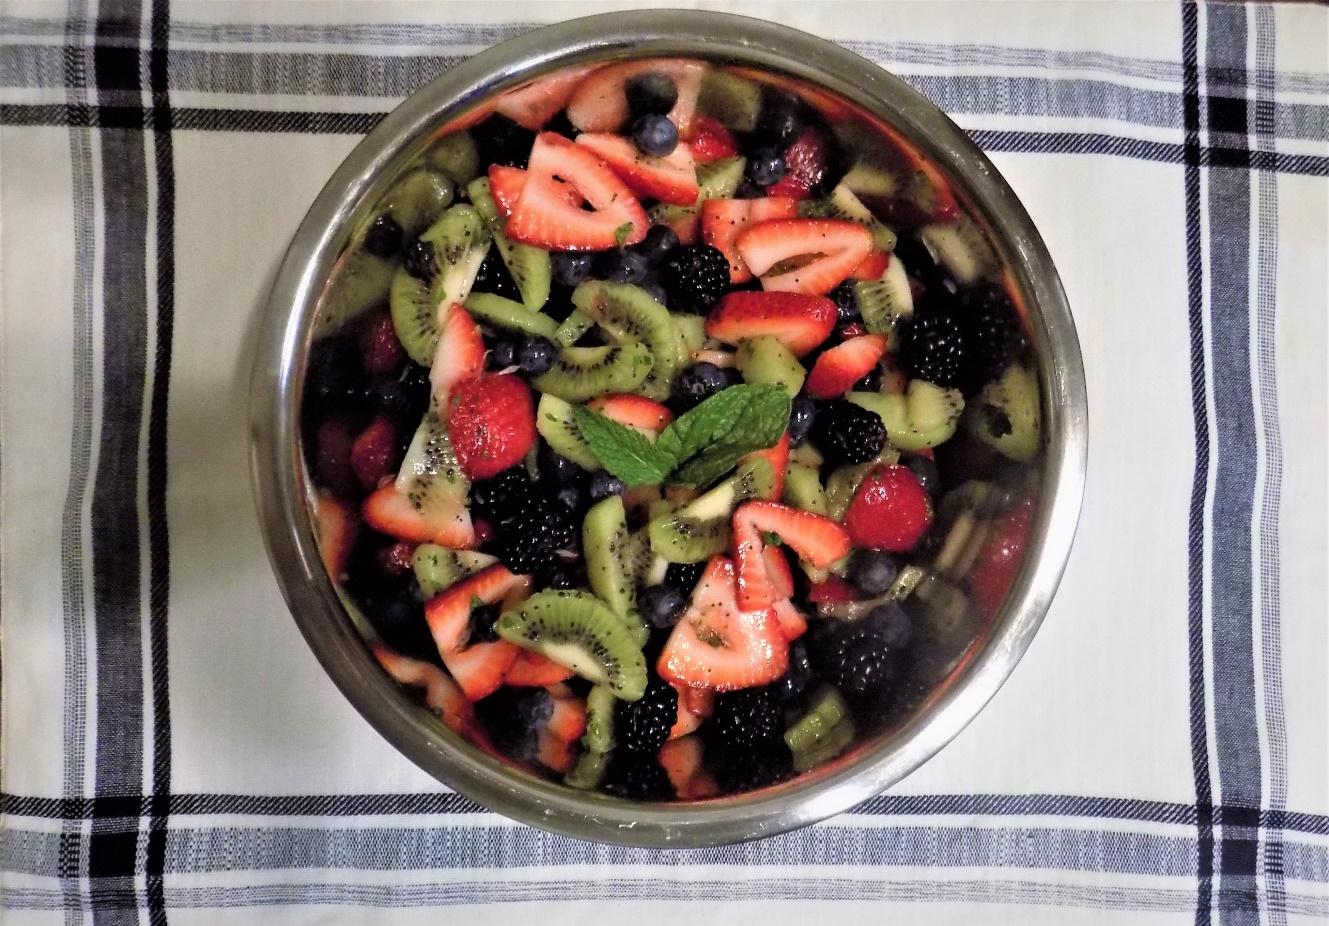
    Berry-Kiwi Salad with Mint-Lime Dressing
    • 1/4 cup freshly squeezed lime juice
    • 1 pint strawberries, hulled and sliced
    • 1 cup kiwi, cut to 1/4 inch pieces
    • 1 cup blackberries
    • 1 cup blueberries
    • 2 1/2 tablespoons honey
    • 1 tablespoon finely chopped fresh mint leaves
    • 3/4 teaspoon poppy seeds


    1. Whisk together lime juice, honey, mint leaves, and poppy seeds in a small bowl. Set aside.
    2. Gently toss berries and kiwi together in a medium-sized bowl. Drizzle dressing over the fruit and toss gently to combine. Serve immediately.

    Recipe from Savoring the Seasons with Our Best Bites by Sara Wells and Kate Jones


    The simple ingredients


    If you’re not sure where to begin on peeling and slicing a kiwi, cut each end off and slide a spoon between the inside of the fruit and the skin. Continue around the entire kiwi until it pops out of its skin.


    Our gorgeous berries and kiwi before adding the mint-lime dressing.
    My little berry-loving pup begging for a taste!
    The finished product! Look at those beautiful colors!

    Enjoy!

    Friday, April 29, 2016


    Did snack time end with nap time when you were a kid? Or are you combatting the munchies all day long? Whatever you current snacking situation, these tips will  help improve the way you snack and control your appetite!


    To snack or not to snack?

    Many people might think that eating snacks might lead them to eat more food and gain weight. But that certainly isn’t the case! Eating a snack or two throughout the day can help curb your hunger and help prevent you from overeating at meals. Snacking can also kick a craving or pack in some extra vitamins and minerals. The key is to snack smart.


    Smart snacking tips and tricks

    How DOES one snack smarter? There are more than a few ways to improve your snacking skills and pack in some nutritious mini meals to power you through your day. We won’t name all of them, but here are a few to get you started:

    1.    Snack on Fruits and veggies

    Most people aren’t consuming enough fruits and vegetables in their regular meals. Eating them for snacks can fill in the gaps in your diet and provide some essential vitamins and minerals.

    2.    Chew your snacks

    Studies have revealed that chewing your food more can help you feel fuller and more satisfied. Munching on something crunchy like almonds is a great way to satisfy your growling  stomach!

    3.    Spice it up!

    Add spices and herbs to a plain snack, like those crunchy almonds, to make them savory or sweet (or a little of both!).

    4.    Don’t snack mindlessly

    Try not to be distracted while you are eating, so you can be aware of how much you have eaten. If you like to have a snack while sitting down to watch a movie, only bring one serving size of the snack to reduce your chances of overeating.

    5.    Combine proteins and carbs

    Pairing a high protein food such as nuts or dairy with a high carbohydrate food like granola can not only help the snack to feel more like a small meal, but it will also help you feel fuller for longer. It’s a great way to get some quick energy without worrying about getting hungry again too quickly.

    If all of these tips have just made you hungry, maybe you need a snack! 


    Try out this awesome recipe for honey roasted almonds. As I’ve mentioned a couple of times, almonds make a perfect snack! They are great to munch on, you can flavor them however you want, they make a perfect movie munchie, and they pack in some excellent protein! Stored in an airtight container, this tasty snack will last for several days.

    Honey Roasted Almonds:

    Ingredients:
    1 1/2 cups raw, unblanched almonds
    1 tablespoon sugar
    1 1/2 tablespoons honey
    1/2 teaspoon ground chipotle chile powder
    1/4 teaspoon ground cumin
    1/4 teaspoon salt

    Instructions: 
    Line a large baking sheet with parchment paper.
    Place the almonds in a medium nonstick skillet; cook over medium heat for 6 minutes or until lightly toasted, shaking pan frequently. Combine the remaining ingredients in a 2-cup glass measure. Microwave at HIGH for 30 seconds. Add honey mixture to pan, and cook 2 minutes, stirring constantly. Arrange almond mixture on prepared baking sheet in a single layer; let stand 10 minutes. Break apart any clusters.